Best practices for snow- and ice-melting installations
Winter is coming.

A REHAU snow- and ice-melting system is installed at Union Station in Toronto. Photo credit: REHAU

REHAU RAUPEX crosslinked polyethylene (PEXa) pipe is installed at the Solaris Town Center in Vail, Colorado. Photo credit: REHAU

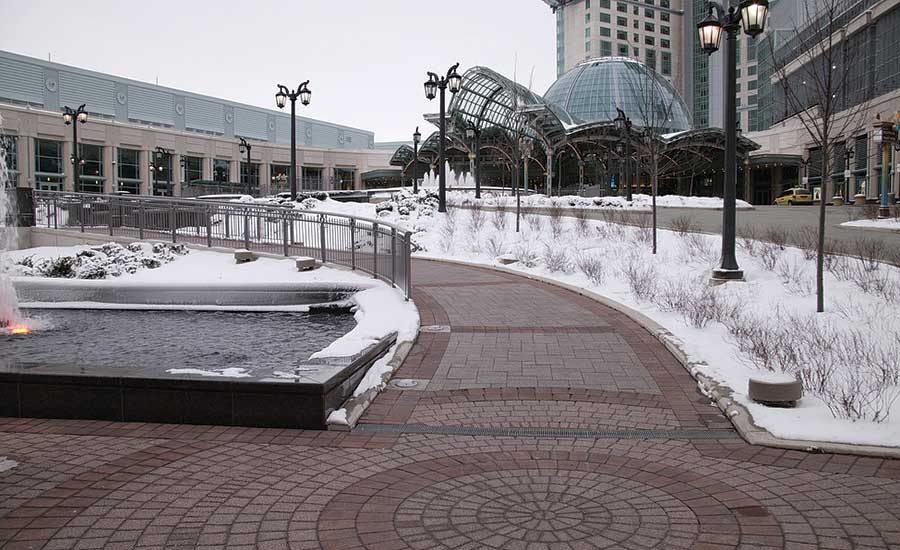
A REHAU snow- and ice-melting system clears pathways around the Fallsview Casino Resort in Niagara Falls, Ontario, Canada. Photo credit: REHAU


Winter is coming, and snow and ice removal can wreak havoc on public and commercial facilities. Within minutes, outdoor surfaces can become icy, posing a serious safety risk and liability concern.
According to the Centers for Disease Control and Prevention, accidental falls are the No. 1 cause of nonfatal injuries in the U.S., and in Canada, the Public Health Agency of Canada found falls account for almost one-third of all adult deaths caused by accidental injury.
Given the risks and unpredictability of weather events, facility managers have reason to consider alternatives to traditional snow removal. This creates opportunities for mechanical contractors who are comfortable designing and installing hydronic snow- and ice-melting (SIM) systems.
Traditional manual snow removal is not only labor-intensive and costly during the winter season, but it can also lead to dangers and hidden costs such as salt runoff, equipment emissions, injuries and damage repair. The costs may continue to mount after winter is over, for example, for redoing landscaping buried under snow banks and repairing sidewalks and driveways damaged by chemical deicers and snow-removal equipment. There may even be damage to carpets and floors from salt and other chemicals being tracked indoors.
Hydronic SIM systems can put facility managers back in control of their time and budget while making outdoor surfaces safer. Whether a Polar Vortex or just a typical winter, they’ll have fewer maintenance hassles and fewer liability risks, and they’ll be in control.
Determining SIM load
For the best performing SIM system, several things need to be considered before installation.
The actual SIM load is based on the energy required to melt snow, drain the majority of the water away from the slab, and evaporate the remainder. Factors that affect SIM loads are:
• Geographic location;
• Type of application (e.g., private driveway versus emergency entrance ramp);
• Air temperature when snowing/melting;
• Rate of snow fall;
• Snow density;
• Wind velocity;
• Humidity level of the atmosphere; and
• Slab temperature at the start of snowfall.
These factors help determine the energy required, per square foot, to melt the ice or snow. For example, a private driveway may require half the SIM load of an emergency entrance ramp because of the less critical nature of the application.
SIM systems are typically designed to handle 99% of weather events in the most critical applications. In non-emergency applications, the calculation parameters for “how free” and “how often” are typically set lower.
Once the SIM load is known for a project, the next design steps are to:
• Estimate downward losses;
• Calculate total loads for the heat source (typically a condensing boiler);
• Design the piping system for delivering the calculated requirement (this includes selecting pipe size, spacing, and circuit lengths, which are typically ¾-inch PEX pipes at 9-inch spacing with circuit lengths ranging from 200 to 350 feet);
• Select the type of heat transfer fluid (usually propylene glycol mixed with water);
• Calculate the flow rate for the SIM piping system to deliver the required load;
• Determine the head loss through pipes, manifolds, heat source and other equipment; and
• Select the right circulator and other hydronic components, such as expansion tanks.
What control option is best?
Manual on/off. A simple on-off switch with no slab sensors, while economical and chosen by some, is not recommended for SIM systems. The manual switch is used to turn a boiler and pump on and off. The lack of temperature-control sensors allows the slab to heat up too quickly, which increases the risk of stress fractures.
It is also easy to forget to turn this system off, which leads to unnecessary energy consumption. The facility owner will waste far more money in energy inefficiency than is saved with this low-cost control system.
Automatic start, timed stop. An automatic-start, timed-stop control system is triggered to turn on by snowfall, using moisture and temperature sensors, and turns off in a preset amount of time.
To detect moisture in dry snow or ice, the sensor’s integrated heating element must first melt the snow or ice. Then, the melted water conducts low-voltage electricity across the metal rings on the sensor surface. If it’s cold and there is moisture on the sensor, the system knows the surface must be covered with snow or ice.
This system is better than the manual on/off system because the owner doesn’t have to remember to turn it off. However, since every snowstorm is different, it is highly likely that the amount of operating time will overshoot or undershoot the required melting time.
Automatic start, automatic stop. An automatic-start, automatic-stop control system is the most efficient way to operate a SIM system. This control conserves energy by calculating how warm the slab needs to be to melt and evaporate the snow and turning the system off once the surface is dry. By operating only when required and not stressing the slab by overheating, it also protects the longevity of the surface.
Temperature sensors react to the slab temperature by adjusting supply/return fluid temperatures. These fully automatic controls eliminate the need to guess how long it will take to melt the snow. For the facility manager, this control strategy minimizes operating and maintenance costs by precisely controlling the slab temperature and run time.
Automatic start, automatic stop with weather forecast integration. Making use of digital technology, the best SIM control systems can also integrate a zip code-based weather forecast to automatically anticipate incoming snow or ice.
These smart controls may access forecasts from National Weather Service or Environment Canada and can be programmed to warm the melting area a certain amount of time before the snowstorm begins, in order to speed up response time. With these capabilities, the owner has ultimate control for safety, efficiency and protection of critical outdoor areas.
Locating the outdoor moisture sensor
An outdoor moisture sensor is the best way to accurately identify snow on a slab. If it doesn’t get the weather exposure it needs, then it may not activate the SIM system. Be sure to install the SIM system sensor in a surface where it will detect the most important moisture, such as:
• The area most likely to be hit with falling or blowing snow;
• The last place to be warmed by sun (shady areas); or
• The last place to be dried after drainage (lower areas).
Don’t position the sensor where cars are normally parked, close to roof coverage, under a deck or near landscaping where it is protected from blowing snow. Also avoid locations where melting snow from a roof might activate it even if the driveway is dry. Make sure the location you choose is level with the slab, not above or below it.
When to install snow-melt systems
The ideal time to install a snow and ice melting system is when outdoor surfaces are being installed or replaced. This way, the piping network can be laid prior to placing the surface.
It is also best to install during the warmer months so the newly poured concrete has enough time to properly set before the first snowfall.
Be ready for the storm
Before the first snowflake touches the surface, a SIM system is ready to protect properties from harsh winter weather.
With proper design and installation, these systems provide long-term performance and reliability. The facility owner will avoid the wear-and-tear of traditional snow removal — on the facility and its maintenance staff — while improving safety of building occupants and visitors.
Author bio: Jon Bittenbender, director of engineering for the building solutions division of REHAU, has been involved in the engineering of the company’s PEX-based applications including plumbing, radiant heating and cooling, hydronic piping, turf conditioning and snow and ice melting since 1999. Prior to REHAU, Bittenbender was a specifying engineer for a MEP firm, where he designed HVAC systems for commercial and residential buildings. He holds a bachelor’s of science in mechanical engineering from Penn State.
Looking for a reprint of this article?
From high-res PDFs to custom plaques, order your copy today!


