Residential Plumbing Drains
A plumber’s guide to residential floor drain selection and installation
8 important factors to consider.

Courtesy of imaginima/E+/Getty Images and PC Photography/iStock/Getty Images Plus

Selecting the appropriate drain and following drain installation best practices can make all the difference in a system’s overall performance. Courtesy of imaginima/E+/Getty Images and PC Photography/iStock/Getty Images Plus
Drains are a vital component of any home’s plumbing system. Selecting the appropriate drain and following drain installation best practices can make all the difference in a system’s overall performance.
This article covers eight important factors to consider when selecting and installing a residential floor drain.
1. Application
Selecting a floor drain depends on the application, whether it is for a shower drain or an area drain. There are various types of floor drains to choose from, including linear drains, center-point drains, and general-purpose drains.
Linear drains are rectangularly shaped and can be installed at the entrance, along the wall, or in the center of the shower floor. They allow water to flow through the drain and into a trough or channel beneath the shower floor. Linear drains offer functional benefits, such as increased safety, accessibility, and design flexibility. They are especially suitable for curbless showers or universally accessible wet spaces.

QuickDrain's linear drain system can be customized to fit wall-to-wall in a shower enclosure, providing easy installation and minimal standing water. Photo courtesy of Oatey
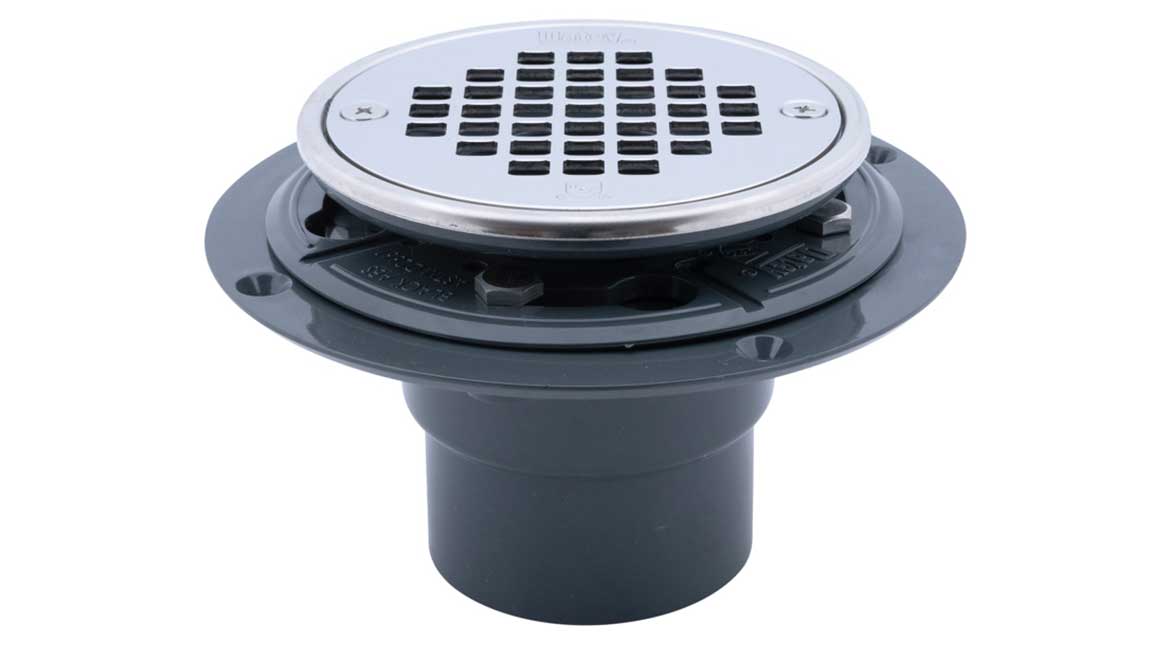
Center point drains are typically located at the center of the shower floor and can be square or round. Water flows via a conventional four-way, compound slope toward the drain.

Oatey 130 Series Shower Drains are a cost-effective center point drain option designed for use with tile or marble showers. Photo courtesy of Oatey
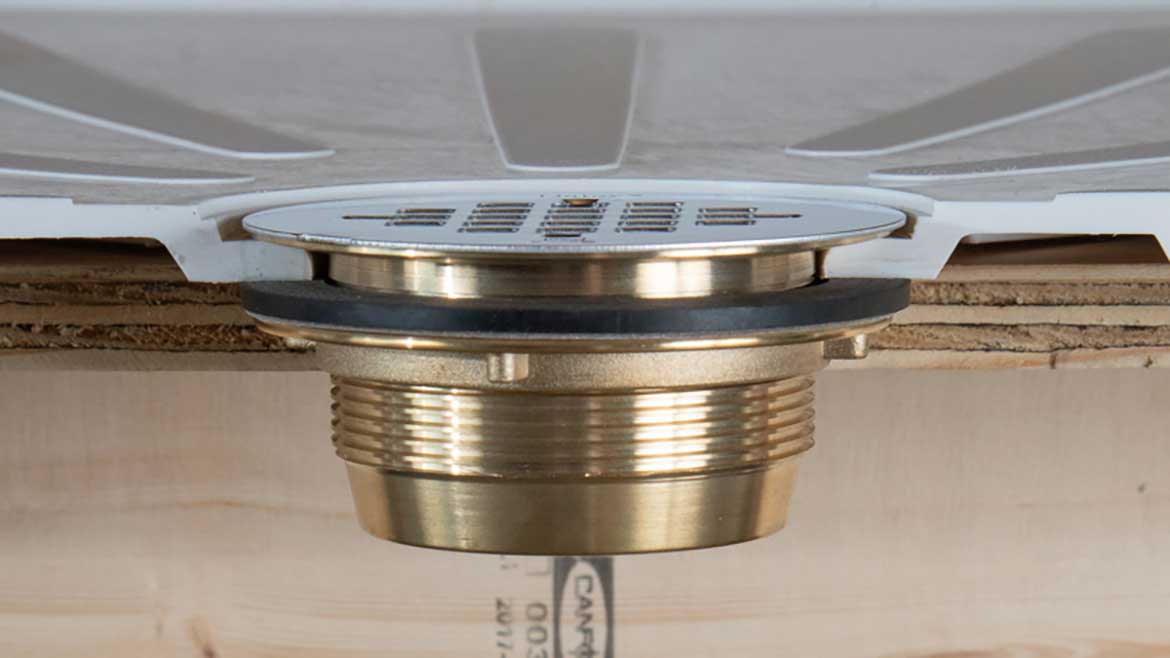
If you use an acrylic or fiberglass base, no-caulk drains are popular because they do not require PVC or ABS cement to connect to the pipe. They are designed for preformed shower bases and attach over a 2-inch pipe with a mechanically compressed gasket.

The Oatey 140 Series / 101 PNC Series No-Caulk Round Brass Shower Drain with Stainless Steel Strainer mechanically attaches over 2 in. Schedule 40 DWV pipe, no caulking required. Photo courtesy of Oatey
General purpose area drains are designed to remove water and other liquids from basements, laundry rooms, garages, and patios. These drains come in various types and sizes, with different strainers and finishes.

Oatey’s Hub PVC General Purpose Drain and ABS General Purpose Drain are recommended for general-purpose usage. Photo courtesy of Oatey
Integral floor drains have a built-in trap and backflow device. They combine multiple components into one unit, eliminating the need for additional pipes and fittings.

The Oatey Integral Floor Drain With P-Trap and Backwater Valve provides a comprehensive solution for preventing backflow and sewer gases from entering living spaces. Photo courtesy of Oatey
This type of drain is especially useful for ensuring the safety and functionality of basement areas.
In conclusion, when selecting a floor drain, it is important to consider the application and specific needs of the space. Linear drains, center point drains, and general-purpose drains all have their advantages depending on the design and layout of the shower or area.
2. Plumbing connection
When selecting any drain, the plumbing connection is the first factor to consider to ensure a successful and leak-free installation.
The plumbing connection involves a few aspects, such as pipe material, connection type, pipe size, and shower base, all of which play a role in determining the appropriate drain for your installation.
Pipe material: As with any drain installation, the material of the pipe is crucial. You need to ensure that the drain you choose matches the pipe material you connect to. For PVC piping systems, use a PVC drain; for ABS systems, use an ABS drain. This ensures compatibility and a secure connection.
Connection type: The connection type is another important factor when selecting a shower drain. Different pipe materials require different connection methods. Most PVC, ABS or CPVC drain bodies must be solvent welded over 2-inch or inside 3-inch pipe.
If you will be joining a PVC, ABS or CPVC drain to its corresponding pipe, you must select the corresponding solvent cement for the connection. For example, use PVC cement for PVC connections and ABS cement for ABS connections.
This is arguably one of the most critical steps in the solvent welding process. If a cement and pipe material are incompatible, the drain and pipe cannot chemically fuse together, leading to leaks and failure.
Pipe size: Matching the drain size with the pipe size is crucial for a functional drain installation. Ensure that the drain size aligns with the pipe size you connect to. By using a drain that works with multiple pipe sizes, you can eliminate the need for purchasing a separate drain for each pipe size, ultimately saving time and money.
It’s worth noting that in most cases, the sizing for the drain and pipe will be determined by an engineer or specified on the project prints before the installation. For example, on a commercial project, the prints might state which size to use, based on the size and scope of the project.
However, in design-build situations, figuring out the sizing may fall on the contractor or installer. In most cases, a three- or 4-inch drain will handle a significant amount of water flow, but special circumstances may require even larger sizing.
Regardless, matching the drain and pipe size is crucial for a functional drain installation. By doing so, you can avoid costly and time-consuming mistakes or the need to purchase multiple drains to accommodate different pipe sizes.
Shower base: The type of shower base you select will determine the type of drain you need. For instance, if you have a tiled shower base or a marble shower with a shower pan liner, you would need a drain specifically designed for tile or marble showers.

Oatey No-Caulk Shower Drains are designed for pre-formed shower bases and attach over 2-inch pipe with a mechanically compressed gasket that does not require solvent cements. Photo courtesy of Oatey
3. Pay attention to surface area
Draining a larger surface area requires a larger drain. So, for drainage in a garage, patio, or other large outdoor areas, use larger drains such as the 6-inch by 6-inch utility drain to accommodate the space. This drain is available for both ABS and PVC applications.
For a smaller surface area, such as a shower base, offset shower drains are the best options. They feature an offset design that allows for a 1 1/2 inch margin of error when roughing in the pre-formed shower stall base. This offset offers room to work around joists and imperfect slab penetrations.

Oatey Series OffSet Shower Drains feature an offset design that allows for a 1 ½ inch margin of error when roughing in the pre-formed shower stall base. Photo courtesy of Oatey
4. Pair drain with discharge rate
It’s important that the drain can adequately handle the anticipated volume of drainage. Drains are designed to handle certain discharge rates, measured in gallons per minute (gpm).
For example, a floor drain in a commercial kitchen may need to handle a higher flow rate than a floor drain in a residential basement. Consequently, knowing the discharge rate of whatever equipment you must connect to a drain is important.
In addition, choosing a drain with a higher flow rate than required can be unnecessarily costly, while choosing one with a lower flow rate can lead to clogs and other issues. In short, carefully consider the discharge rates of the application when selecting your drain.
Regarding shower areas, choosing an appropriately sized drain and one long enough to handle all the showerheads and other equipment is essential to prevent water backup from leading to hazardous situations. You can check the gpm rating on the equipment or from the product.
Regarding general-purpose drains, choosing a drain that can handle a worst-case scenario emergency is recommended. In emergencies like line bursts or washer malfunctioning, having a drain that can handle the consequent heavy water flow could prevent water damage while stopping the water supply.
5. Decide if waterproofing is incorporated
Drains don’t always require a waterproofing membrane, so be cautious in selecting the appropriate drain. Basement floor drains fit into this category. There are plastic snap-in drains that can be inserted into a Schedule 40 DWV pipe cut flush with the floor for easy removal.
For a more permanent installation, the snap-in drain can also be solvent-welded. It comes in just one piece, which prevents the cover from being removed. If waterproofing is not required, this snap-in drain option could be suitable.
However, if waterproofing is necessary, selecting the correct product that can seamlessly integrate with the drain is crucial. This ensures there are no potential points of failure if water is present.
Install Tip: When it comes to waterproofing, many installers make the mistake of leaving the weep holes in the drain base unprotected. This prevents water from evacuating through those holes. In time, this over-saturation causes the thin-set below the tile or mortar bed to deteriorate, leading to mold and mildew in the shower as well as a foul odor or discoloration.
Weep holes are important in any shower system to evacuate water wicking through the grout or cracks between the horizontal and vertical wall transitions. Installers can utilize weep guards or pea gravel around the drain barrel to ensure the weep holes do not get clogged.
When installing the drain clamping ring, ensure the weep holes are clear of any residual pan liner or silicone.
When you apply silicone caulk around the surface of the inner flange for the liner installation, be sure not to apply too much. Many installers tend to think more is better, but that’s not true. If you apply too much silicone, there’s nowhere for it all to go after you place the clamping collar. So, the excess silicone tends to bubble up under the liner and can block the weep holes.
6. Consider Drain Profile
The drain profile plays a crucial role in the overall aesthetics of the space. It can also affect water flow into the drain. This is particularly important for a tile shower on a second floor, it’s essential to ensure that the drain can be seamlessly integrated and still leave enough room for a P-trap. Since there is usually limited space between floors, opting for a lower-profile drain is advisable.

A great example of a low-profile floor drain is the Oatey 130 Series Low-Profile Drain. These drains are specifically designed for tight spaces, making it ideal for retrofits and renovations. Photo courtesy of Oatey
7. Factor in Aesthetics
Whether it be a beautiful custom shower or utility floor drain, consider the aesthetic options available for the perfect blend with the environment. Drains come in various colors and finishes, from matte black and white to brass and stainless steel.
The choice of drain can be as simple as the look and shape you prefer. A linear drain would be the way to go if you are looking for spa-like luxury and high-end aesthetics. With its sleek, distinctive appearance, this type is an especially good choice if you want to make an impression.
A center point drain will be your best bet if you prefer a more traditional look and feel. However, opting for a center point drain does not mean you must sacrifice style. Many square drains have elegant cover designs that appeal to every décor and need.

QuickDrain’s expanded line of decorative covers and finishes are available for SquareDrain and complements all major design trends, including mid-century modern, industrial, contemporary, and modern farmhouse. Photo courtesy of Oatey
8. Prep Work
When it comes to drain installation, ensuring the pipes themselves, including riser pipes, are level is crucial. It is also important to do the necessary legwork ahead of time to determine the slope toward the drain, requiring coordination with a mason or other tradespeople to prepare the area properly. Carefully evaluating these factors can help avoid excessive drain height discrepancies.
W23qIt’s essential to avoid having the drain set too high, as this can prevent proper drainage and cause water to pool outside the drain.
By working ahead of time and planning for the slope, whether it’s in a shower, patio, or other area, the drain installation can be seamlessly integrated into the overall construction process.
Plumbers may use tools like lasers or strings to determine the proper height and position of the drain. This prep work is typically done before the concrete is poured and the tile or other finishes are installed.
By collaborating with other professionals and accurately measuring and setting the drain, the end result will be a properly functioning drain that seamlessly fits with the finished floor.
Looking for a reprint of this article?
From high-res PDFs to custom plaques, order your copy today!


